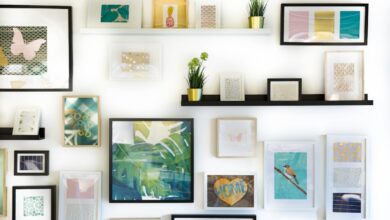
Why Gallery Walls Work in Any Home
These gallery wall ideas will help you create a wall display that looks intentional, personal, and genuinely beautiful. A gallery wall is one of the most personal, impactful, and surprisingly affordable ways to transform a blank wall. Done right, it tells a story — your story — through art, photos, mirrors, and objects that matter to you. Done wrong, it looks like a yard sale. The difference is planning, and that’s what this guide is for.
From salon-style arrangements to clean grid layouts, these gallery wall ideas give you everything you need to create a wall display that looks intentional, personal, and genuinely beautiful.
From salon-style arrangements to clean grid layouts, these gallery wall ideas give you everything you need to create a wall display that looks intentional, personal, and genuinely beautiful.
Whether you’re working with a single blank wall in your living room, a hallway that feels too plain, or a staircase that needs personality, gallery walls are almost always the answer. Here’s exactly how to create one that looks intentional, balanced, and genuinely beautiful.
Gallery Wall Ideas Step 1: Choose Your Style
Before you buy a single frame or pick up a hammer, decide on the look you’re going for. Gallery walls fall into a few broad categories:
- Curated and cohesive: All frames the same color and material (typically all black, all white, or all natural wood), with art that shares a color palette. Feels polished and intentional.
- Eclectic mix: Different frame styles, sizes, and materials mixed together. Works best when the art itself has a unifying thread — a color, a theme, a mood.
- Grid layout: All frames the same size, arranged in a perfect grid. Clean, modern, almost architectural. Works especially well with a series of prints or photos.
- Organic salon-style: Frames of all different sizes arranged in an asymmetric, flowing layout that expands outward from a central anchor piece. Classic, dramatic, and full of personality.
Step 2: Gather Your Pieces
Your gallery wall doesn’t need to be all framed art. Some of the most interesting gallery walls mix different types of objects:
- Framed prints and photographs
- Mirrors (great for bouncing light and adding dimension)
- Woven wall hangings or macramé
- Shelves with small objects on them
- Clocks, letter boards, or decorative plates
- Mounted antlers, plants in wall-mounted planters, or architectural salvage
Start by pulling together everything you’re considering — lay it all on the floor and see what works together before committing anything to the wall.
Step 3: Plan Your Layout on the Floor First
This is the step most people skip and then regret. Lay all your pieces out on the floor in the arrangement you’re thinking of. Live with it for a day or two. Try different configurations. This is free, reversible, and will save you from filling your walls with unnecessary holes.
Once you’re happy with the arrangement, trace each frame onto paper, cut out the shapes, and tape them to the wall with painter’s tape. Step back and assess. Adjust until it looks right. Then hang everything using the paper templates as guides.
Step 4: Find Your Anchor Piece
Every great gallery wall has an anchor — a central piece that’s larger, bolder, or more prominent than everything else, and around which the rest of the arrangement orbits. This might be your largest print, a statement mirror, a canvas painting, or even a decorative clock.
Hang your anchor piece first, then build outward from it. Keep the visual weight balanced — if your anchor is on the left side, make sure the right side of the gallery has enough pieces to balance it.
Gallery Wall Spacing: The Rules (and When to Break Them)
The classic advice is 2-3 inches between frames for a tight, curated look, or 4-6 inches for a more relaxed feel. These are good starting points, but what matters most is visual consistency — whatever spacing you choose, keep it roughly the same throughout.
One rule worth following: hang the center of your gallery wall at eye level, which is typically 57-60 inches from the floor. If the gallery is above a piece of furniture, leave 6-8 inches between the furniture and the bottom of the lowest frame.
Gallery Wall Ideas by Room
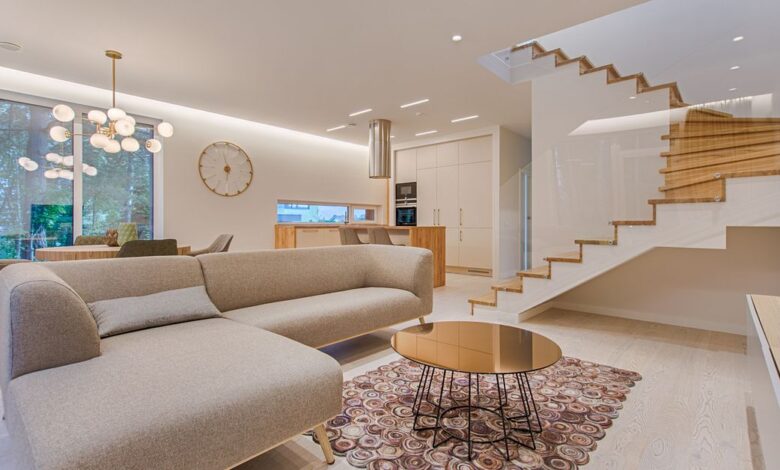
Living Room Gallery Wall
The living room is the classic gallery wall location. A large blank wall behind the sofa is prime real estate. For a salon-style arrangement, start with a large central piece at eye level (when standing), then build outward with pieces of varying sizes. Mix art with a mirror or two to add depth and light reflection.
Bedroom Gallery Wall
Above the bed is a natural gallery wall spot. A symmetrical arrangement — equal pieces on each side of a central anchor — works well here since it mirrors the symmetry of the bed itself. Or go for a single large statement piece instead of multiple smaller ones for a more dramatic, minimal look.
Hallway Gallery Wall
Hallways are perfect for photo galleries. Line one wall with family photos in matching frames for a warm, personal timeline. Or use a series of small botanical prints, travel photos, or black-and-white photography for a more sophisticated look. Keep it simple in narrow hallways — fewer, larger pieces rather than many small ones.
Staircase Gallery Wall
Staircase gallery walls follow the diagonal line of the stairs. Start at the bottom with your smaller pieces and scale up to larger pieces as you go higher, or do the reverse. Keep the center of each frame roughly aligned with an imaginary diagonal line running parallel to the staircase.
Budget Gallery Wall Ideas
Gallery walls don’t have to be expensive. Some of the most beautiful arrangements come from creative sourcing: For more inspiration, visit Architectural Digest.
- Print your own art. Sites like Unsplash offer free high-resolution images you can download and print at a copy shop for a few dollars each.
- Thrift store frames. Buy mismatched frames from thrift stores, then spray-paint them all the same color for an instantly cohesive look.
- Family photos. Your best photos, printed large and framed, cost almost nothing and mean more than any purchased print.
- Clip boards or washi tape. For a commitment-free, renter-friendly gallery wall, use clip boards or strips of washi tape to hang art without any nails at all.
Common Gallery Wall Mistakes
- Starting too small. A few tiny frames on a large wall looks lost and sad. Go bigger, or add more pieces.
- No anchor piece. Without a central focal point, the eye doesn’t know where to go. Every great gallery wall has a star.
- Inconsistent spacing. Some gaps huge, some tiny. Choose a consistent spacing and stick to it throughout.
- Hanging too high. The most common art-hanging mistake. Eye level means 57-60 inches from the floor to the center of the piece, not to the top.
Final Thoughts
A gallery wall is one of the most personal things you can do to a space. It’s not about having the most expensive art — it’s about curation, arrangement, and the stories your walls tell. Plan on the floor first, anchor your arrangement, keep your spacing consistent, and don’t be afraid to mix different types of objects. The result will be a wall that’s uniquely, beautifully yours.